Distilling Memories Into Six Frames
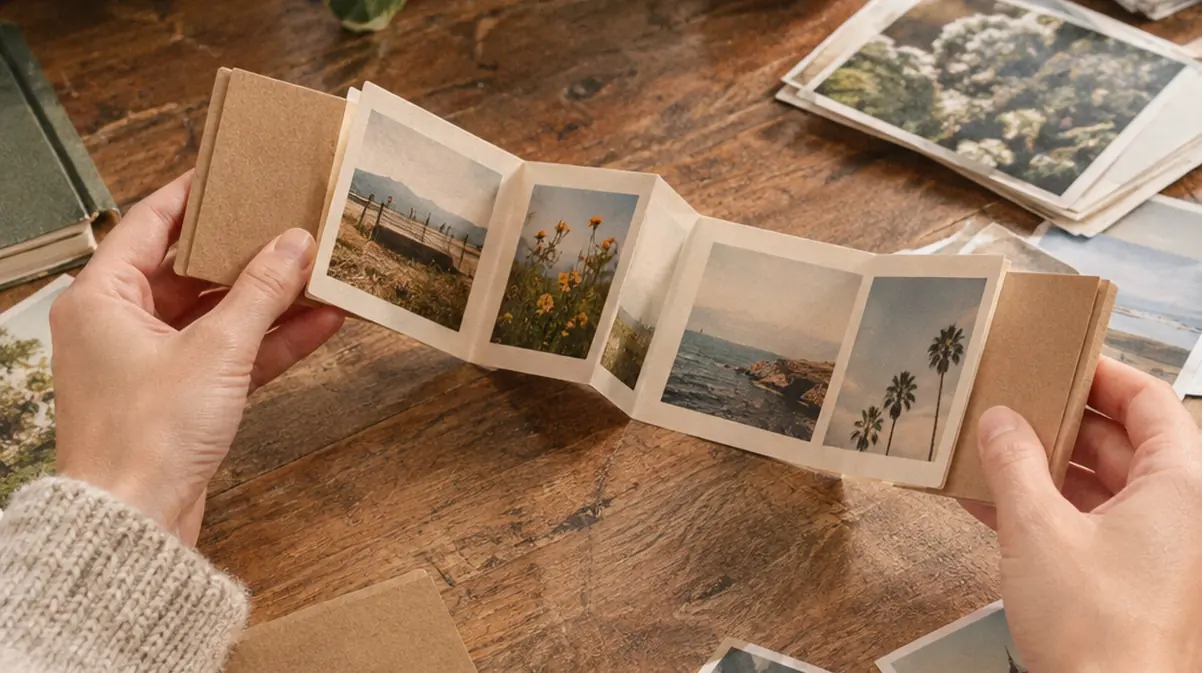
Scrolling through thousands of images on a phone creates a sense of visual fatigue. We capture everything, yet we rarely sit down to appreciate the individual moments hidden within those massive digital galleries. Extracting a handful of those moments into a physical format restores their value. Choose six prints that tell one small story, then arrange them before cutting any paper. The fixed sequence gives each image a specific job.
The viewer can hold the whole memory in their hands—a self-contained narrative with a distinct beginning and end.
Building this tactile keepsake requires sturdy materials. Gather heavyweight cardstock, a bone folder, a metal ruler, photo corners, and six to eight square retro prints. Six prints make the clearest short sequence for a pocket-sized project. Having a couple of extra photographs allows for a final choice after arranging them on your workspace. Set aside 10 to 20 minutes to select and order the prints before making the album.
This brief curation period transforms a chaotic camera roll into a deliberate narrative. By restricting the project to a handful of frames, you eliminate the pressure to document every second of an event. The focus shifts to the emotional resonance of the chosen images.
Selecting Heavyweight Cardstock
The foundation of your album relies on the structural integrity of the paper. Flimsy paper will buckle under the weight of the mounted photographs and wear out quickly at the hinges. Heavyweight cardstock provides the rigidity to support the prints while maintaining crisp folds that allow the accordion to function properly.
Sizing and Scoring the Cardstock Base
Crafters often struggle with calculating the dimensions for a folding album. Size the fold to the photograph first, then calculate the strip. This approach keeps the margins consistent across the project and makes the accordion compact enough to open one panel at a time or stand fully extended on a display shelf.
For a 3.5-inch square print with a 0.5-inch margin on every side, make each panel 4.5 inches square. Six panels require 27 inches of strip length. Eight panels require 36 inches. Since standard cardstock rarely comes in lengths of 36 inches, you will likely need to join shorter cardstock strips at a panel boundary.
Paper grain affects the durability of the album. Run the cardstock grain parallel to the vertical fold lines to reduce cracking. You can find the grain direction by gently bending the paper both horizontally and vertically; the direction that offers the least resistance is parallel to the grain. Folding with the grain helps the album open smoothly over time.
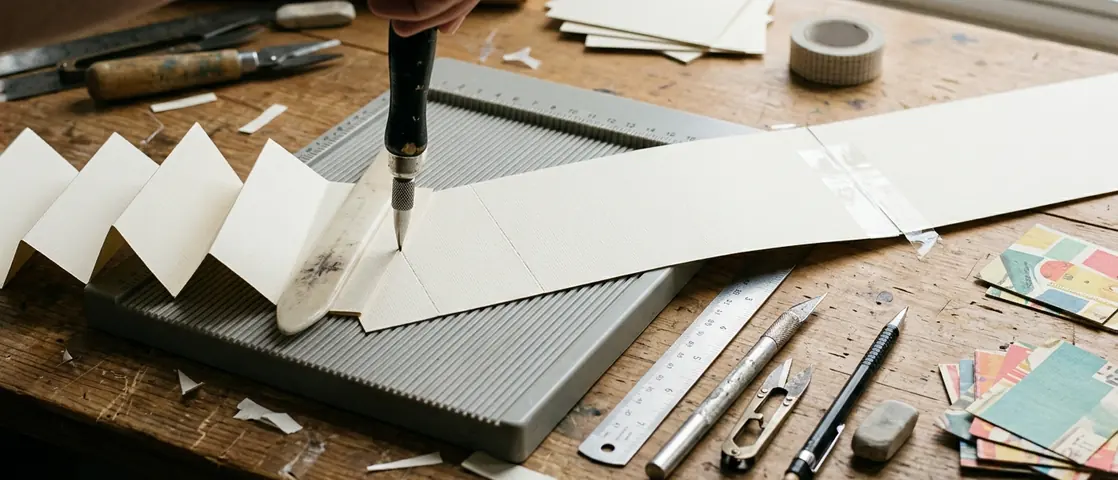
Mark fold lines every 4.5 inches along the length of your cardstock strip. Hold a metal ruler firmly on each mark to guide your tool. Draw the bone folder along its edge with moderate pressure to compress the paper fibers without tearing them. Fold successive hinges in alternating directions to create the classic concertina shape. Allow 15 to 25 minutes to measure, cut, score, and check a six-panel strip.
Pacing the Visual Storyline
Beginners frequently glue photos down in chronological order without considering the visual flow of the expanded album. Lay out all six prints before mounting them. Place an establishing image first to set the scene. Move into gestures and close details for the middle panels. Reserve the strongest emotional image for the final panel to leave a lasting impression.
View the arrangement both as individual turns and as one continuous row.
Check adjacent panels for abrupt shifts in brightness or dominant color. A dark, moody photograph placed immediately next to a brightly overexposed shot can jar the viewer's eye. If two neighboring compositions both pull the eye toward the same outer edge, reposition one so the expanded album reads as a connected scene.
Balancing Visual Weight
Spend 10 to 15 minutes testing the sequence with the loose prints. Move them around until the transition from one frame to the next feels natural and balanced. Photograph the layout with your phone to preserve the chosen order while mounting.
A fixed sequence keeps the expanded album from feeling cluttered and guides the viewer through the memory at a deliberate pace.
Securing Prints Without Damaging Adhesives
After the sequence is fixed, mark a light placement guide on each panel using a soft pencil. Attach paper photo corners directly to the cardstock base to keep adhesive away from the photograph. Slide each print into the four pockets without pinching its edges.
On a 4.5-inch panel, a centered 3.5-inch print leaves 0.5 inch on all four sides. Cut a 4.5-inch scrap-paper square with a centered 3.5-inch window and use it as a repeatable alignment guide. Place this template over each panel, position the photo within the window, affix the corners, and lift the template away. This simple tool keeps the prints centered across the album.
Direct liquid adhesive can warp a print as the moisture absorbs into the paper backing. Ordinary double-sided tape can age poorly and makes removal difficult if you ever need to rehouse the images. Corners hold the print securely while leaving slight room for movement as humidity changes.
Choosing Safe Photo Corners
Allow 10 to 20 minutes to mount six prints and verify that none are bowed. For a preservation-minded album, choose certified acid-free corners whose adhesive stays entirely on the cardstock. A decorative corner with adhesive touching the print introduces unnecessary chemical risks. Following archival preservation standards for photographs helps keep the images in good condition for future generations to enjoy.
Capping the Ends With Museum Board
Cut the covers only after checking the folded album's finished footprint. The thickness of the folded cardstock and mounted photos can slightly alter the final dimensions. For 4.5-inch panels, cut two 4 5/8-inch-square pieces of acid-free museum board. This slight overhang protects the edges of the inner pages from wear and tear.
Cut each covering material 5 5/8 inches square to provide a 0.5-inch turn-in on every edge. Trim its corners before folding the turn-ins onto the board to prevent bulky, overlapping fabric at the corners.
Wrap each board carefully, pulling the material taut to avoid wrinkles. Fix a ribbon to the outside face of one board before covering it with bookcloth or decorative paper. Leave the ribbon extending beyond the fore-edge to serve as a closure tie. Once the wraps have set, glue the blank outer faces of the accordion's first and last panels to the inside faces of the boards.
Close the covered album under a flat weight while the bookbinding adhesive dries—this sustained pressure helps prevent the boards from warping as the moisture evaporates. Follow the adhesive's stated cure time. Humidity affects drying, so allow in the ballpark of 12 to 24 hours before tying the ribbon snugly or handling the album extensively, unless the adhesive calls for longer.
Never leave the accordion coverless. Cap both ends with rigid, acid-free museum board to shield its folds and give the small keepsake the weight of a book.