Assessing the Baseline for Chemical Emulsion Mimicry
The classic film look comes from light interacting with chemical emulsions: light-sensitive silver halide crystals and multiple dye-forming layers that stay sensitive to different wavelength bands. Many mobile photographers approach retro photography by applying a vintage filter over a snapshot intended for scrapbooking or diy projects. Emulating the chemistry takes a more deliberate progression. Replicating that reaction on a smartphone means mimicking specific physical imperfections. These include dynamic range compression, color shifts, and halation.
A static preset fails because it applies the exact same mathematical response to every image, completely ignoring the unique lighting conditions of the original scene. The progression path toward authentic mobile editing begins with a baseline review of the unedited photograph, somewhere in the ballpark of 30 to 90 seconds. Photographers must check the full frame first, then zoom to 100 percent magnification to inspect the brightest and darkest regions.
This inspection looks for clipped highlights, blocked shadows, mixed lighting, and existing computational sharpening. You must decide which specific film behavior the image can actually support before changing a single pixel. A compressed tonal range suits a faded print, restrained color crossover mimics an emulsion response, and localized glow replicates halation.
Baseline Image Assessment
Always evaluate the unedited photograph for clipped highlights and blocked shadows before applying any adjustments. A static preset cannot account for the unique lighting conditions of individual scenes.
Lifting the Black Point for Faded Shadow Textures
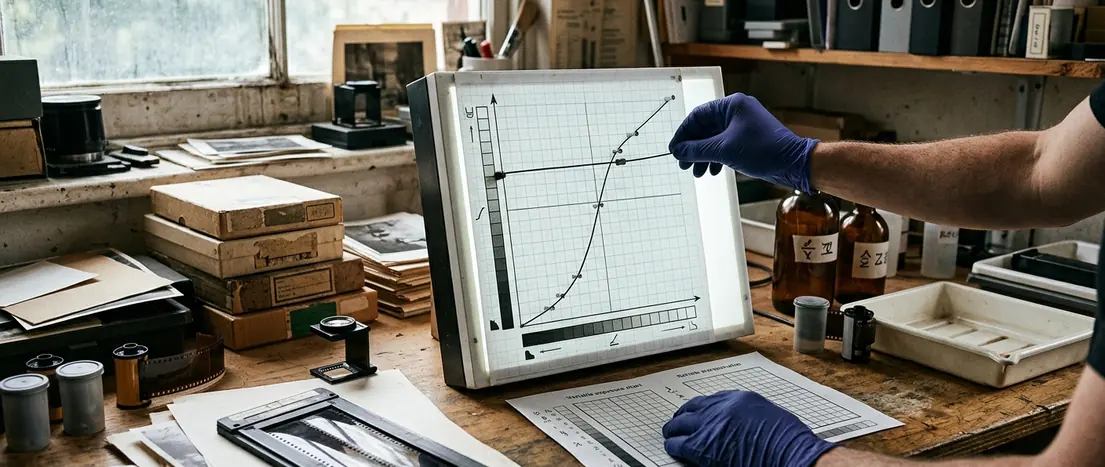
The soft, faded shadows characteristic of aged photographic paper come from manipulating the tone curve before adding any color or grain. Setting this tonal foundation is critical.
On a standard curve expressed from 0 to 255, a restrained starting point involves moving the black output from 0 to roughly 5 to 12. This adjustment turns absolute black into a dark gray. To prevent the entire image from turning flat and lifeless, place a second point in the lower midtones, holding them near an input value of 50 to 70. Control scales differ significantly between mobile editors, making the histogram and the live image preview the final reference points. Dedicate two to four minutes for this first curve pass.
The underlying file type matters here too. Strong black-point lifts are highly forgiving on mobile RAW files. Expanding the dark values of an 8-bit JPEG often exposes existing sensor noise, sharpening halos, posterization, or compression artifacts. Spend 20 to 40 seconds inspecting faces, dark clothing, and background corners at 100 percent magnification. Reduce the lift immediately if the shadow texture starts looking blotchy rather than softly faded.
- Move the black output from 0 to roughly 5 to 12 on a 0 to 255 scale.
- Place a second point in the lower midtones near an input value of 50 to 70.
- Inspect faces and dark clothing at 100 percent magnification for 20 to 40 seconds.
Zoning Color Shifts Across the Exposure Range
A global color tint tends to ruin skin tones when the goal is mimicking classic portrait and landscape film stocks. Grading by exposure zone instead of tinting the whole frame avoids that problem, especially when preparing images for wedding inspiration boards or physical print displays. Different analog film stocks naturally shift colors in varying exposure zones based on their specific dye layer responses.
Use luminance masks or grading wheels to concentrate a cool bias in roughly the darkest quarter of the tonal range and a warm bias in the brightest quarter. Push muted greens or blues into the shadows and add a small yellow-to-orange bias to the highlights. Keep the midtones comparatively neutral so skin and familiar objects remain credible to the viewer.
Begin with 3 to 10 control units of saturation where an editor uses a 0 to 100 scale. Reduce the setting if whites become visibly colored. Spend two to five minutes comparing the grade at fit-to-screen size and 100 percent magnification. Focus 15 to 30-second checks separately on specific elements. Review the color channels after the tone curve, because lifted blacks make even low-saturation shadow colors highly conspicuous.
- Skin tones
- Foliage
- Neutral fabric
- White highlights
Building Organic Texture and Localized Halation
Beginners frequently confuse digital noise with authentic film grain. Digital noise commonly follows the sensor's pixel grid and may show distracting chroma speckles. Convincing film grain varies organically in both size and spacing. The progression path requires adding grain only after tonal and color decisions are completely stable, because later curve changes will alter its visibility. Match the grain size to the intended film speed and output dimensions. Use finer texture for a slow-film impression and larger, rougher clumps for a fast-film impression.

Halation can also be faked—the red-orange glow around bright highlights caused by light reflecting off the back of the film base. Mask only intense highlights and brush a feathered red-orange glow around their edges. Start with a feathered brush at 5 to 15 percent opacity and a radius hovering around 0.2 to 0.6 percent of the image width. Concentrate this effect on backlit edges, bulbs, reflections, and overexposed windows.
Reserve three to seven minutes for applying grain and halation. Inspect the image for 20 to 40 seconds at both 100 percent view and the intended print size. Texture that looks attractive while zoomed in can become overpowering in a small retro print.
Targeted Halation Application
Apply a feathered red-orange glow only to intense highlights using a brush at 5 to 15 percent opacity. Concentrate on backlit edges and overexposed windows to mimic light reflecting off the film base.
Bridging the Gap Between Digital Sensors and Analog Chemistry
Some edits still feel inherently digital despite careful tonal and color adjustments. The structural difference between the mediums explains why. Digital smartphone sensors capture light through a rigid, perfectly uniform grid of square pixels. Film instead suspends irregular silver halide crystals through emulsion depth. In color processing, dye images form in separate layers and the developed silver is normally removed during bleaching and fixing.
The final review process matters just as much. Toggle the complete edit against the original to judge whether the edit behaves like a photographic material rather than a collection of effects. Use a final one to three-minute comparison cycle. View the full frame, inspect highlight boundaries and shadow texture at 100 percent, and then preview the exact crop and dimensions intended for the retro print. Export only after these effects read as one response to light rather than three independent overlays.
Every mobile edit must overcome the mathematical reality of its origin: a Bayer-type sensor sampling color through repeating two-by-two filter groups containing two green-filtered sites, one red-filtered site, and one blue-filtered site.