The Five Phone Photo Checks That Save Retro Prints
A classic square instant print frame holds a 1:1 image area, whereas a standard smartphone camera sensor defaults to a 4:3 rectangle. In pixel terms, a 4000 × 3000-pixel photograph becomes 3000 × 3000 pixels in a square crop. That removes 25% of the original image area, and a centered crop takes 500 pixels from each end of the longer dimension the moment an unedited camera roll photo drops into a square print template.
For crafters and memory keepers turning mobile photography into physical keepsakes, five specific smartphone file traits and production choices ruin vintage-style prints before the ink or silver halide ever hits the paper. The retro-print failure chain happens fast: a group-chat copy loses detail, a square crop removes an outer face, a bright screen conceals dark shadows, and the caption transfers onto the next white border. Catching these traps early protects everything from everyday print displays to heirloom scrapbooking spreads.
Reserve a 3-to-5-minute review session before checkout for a small selection of favorites. This suggested workflow allowance covers three file characteristics and two print-production choices:
- Centering subjects for 1:1 and 3:4 aspect ratios: Standard phone capture commonly uses 4:3, while a full-screen setting may use 16:9. Read the actual file dimensions rather than inferring its shape from the phone display, and manually crop so key edges stay intact.
- Bypassing messaging app compression: Verify pixel dimensions in the gallery details so stripped-down chat downloads or screen captures do not turn into blocky prints.
- Lowering screen brightness to judge real print exposure: Cut display glare to see whether dim indoor scenes or heavy retro photography filters have crushed the shadow detail.
- Clearing visual clutter from border bleed zones: Keep fingers, pet ears, and date stamps inside the supplier's safe area so window masking and trim variance do not slice them off.
- Matching paper texture to marker ink for handwritten captions: Pair glossy or uncoated borders with compatible pens so handwritten notes dry cleanly without smudging across stacked photos.
To run this workflow efficiently, inspect one representative photo first, apply the appropriate crop to each selected image, and finish by reviewing the supplier’s upload previews.
Cropped Foreheads and Lost Edges in Square and Mini Formats
Nothing ruins wedding inspiration boards or tabletop print displays faster than ordering a batch of candid shots and discovering the bride's veil vanished at the top edge or the best friend on the end of a group selfie got sliced in half. When an automated printing kiosk or upload tool forces a rectangular smartphone snap into a vintage frame, its default center crop slices equally from both ends without regard for faces or posture.
Comparing native phone capture formats against the two most popular retro geometries—classic square (1:1) and credit-card mini (nominally 3:4 vertical or horizontal)—reveals exactly where the frame gives way. Use the supplier’s stated image-window dimensions to select the crop, because the outer paper dimensions include the decorative border, and the label "mini" does not establish one universal image ratio.
| Phone Capture Mode | Retro Square (1:1 Window) | Mini Instant (Nominal 3:4 Upright Window) | How to Pre-Crop in Phone Editor |
|---|---|---|---|
| Standard 4:3 (Landscape 4000 × 3000 px) | Becomes 3000 × 3000 px; loses left and right edges (500 px per side in a center crop). | Becomes 2250 × 3000 px; loses severe width, making group portraits particularly vulnerable. | Select a fixed 1:1 or 3:4 crop ratio and pan horizontally so outer faces stay inside the frame. |
| Standard 3:4 (Portrait 3000 × 4000 px) | Becomes 3000 × 3000 px; loses top and bottom edges, often cutting foreheads, hats, or veils. | Matches the 3:4 ratio natively at 3000 × 4000 px without ratio-related cropping. | For square prints, pan the 1:1 box vertically to protect headroom and hands before saving. |
| Full-Screen 9:16 (Portrait 2250 × 4000 px) | Becomes 2250 × 2250 px; removes substantial vertical height from top and bottom. | Becomes 2250 × 3000 px; trims vertical ends to fit the shorter 3:4 upright window. | Check headroom and hands closely in the native editor before committing either version. |
| Square 1:1 (3000 × 3000 px) | Fits a square image window natively without ratio-related cropping. | Removes material from the left and right edges to fit the narrower 3:4 portrait window. | Keep wide group arrangements in square frames, or step back when shooting if mini prints are planned. |
Instead of trusting an automated upload queue, open the phone's native photo editor, select a fixed crop ratio, and pan the image until the important faces and edges sit comfortably inside the crop. Save a copy, upload it, and inspect the print preview again to confirm the framing holds.
Why Saved Chat Photos and Screenshots Print Blurry
Why does a photo that looks crystal clear in a family group chat turn into a muddy, pixelated patchwork on physical paper? Messaging apps and social media feeds compress images to save bandwidth, and phone screenshots only record the displayed screen rendering rather than the underlying camera file. Saving a messaging attachment preserves an already resized or recompressed version. While missing camera metadata alone does not cause blur, the stripped-out resolution data leaves the printer with too few samples to build a smooth image.
Before adding shared photos to an order, run a roughly three-second file inspection right in the phone gallery:
- Swipe up on the photo (or tap Details): Locate the information panel to read the exact pixel dimensions and storage size.
- Separate pixel count from file size: Pixel dimensions describe the available image samples, whereas file size describes storage. Because compression methods and scene detail affect megabytes and kilobytes, a small file size is a warning to investigate further rather than automatic proof of poor print quality.
- Check the math against your target print window: At a target of 300 pixels per inch, a 3 × 3-inch image window calls for 900 × 900 pixels, and a 1.5 × 2-inch image window calls for 450 × 600 pixels.
- Zoom in on faces and high-contrast edges: Pinch to zoom into lettering and skin tones. Re-saved messaging files often reveal square blocks around lettering, halos along high-contrast edges, and waxy-looking facial texture. Keep in mind that original photographs can contain noise too, so visible grain is not an authenticity test.
Match Pixels To Print Size
When an original camera file cannot be recovered through an uncompressed transfer method, switch that photo to a smaller retro format. A 600 × 600-pixel image provides only 200 pixels per inch across a 3-inch square, but delivers a full 300 pixels per inch across a 2-inch square. Printing smaller increases sampling density on paper, even though it does not reconstruct lost facial detail.
Screen Brightness Tricks That Leave Prints Too Dark
Anyone ordering prints for the first time quickly notices how a cozy, dimly lit indoor portrait or a golden-hour silhouette can arrive looking murky and underexposed in the print box. This shift comes down to physics. Phone displays emit light—an LCD uses a backlight, while OLED pixels emit their own light—glowing directly into the viewer's eyes. A photographic print reflects room light off dye or ink sitting on paper, so a luminous screen preview never reproduces the viewing conditions of a physical print.
Dark indoor portraits and strong vintage presets frequently place facial detail close to pure black. Brightening the phone screen makes those shadows easier to see in your hand without changing a single pixel in the file sent to the printer.
To evaluate tonal detail accurately, run a quick mid-brightness screening pass before exporting your batch:
- Stand in a normally lit room, temporarily disable the smartphone's automatic brightness, and set the brightness slider strictly to its midpoint.
- Inspect faces, dark clothing, and shaded backgrounds against a concrete visual target: you should be able to distinguish hair from the background and recover recognizable facial features in shadow while retaining texture in bright fabric.
- If shadows vanish at half brightness, open your editor and raise Shadows modestly, then adjust Exposure while watching pale dresses, clouds, and other highlights so they do not blow out. Because shadow and exposure controls use different scales across editing apps, evaluate the image visually rather than relying on a fixed numerical slider increase.
- Compare the edited image with the original before saving a dedicated print copy, then return the screen to its usual brightness settings so the temporary inspection setup does not stay on permanently.
Because display characteristics, room lighting, paper finish, and a print lab’s automatic corrections can still alter the final output, treat the halfway brightness setting as a repeatable screening step and run a small test order before committing a large event batch.
Border Bleed Zones and Ink Smudges on Vintage Frames
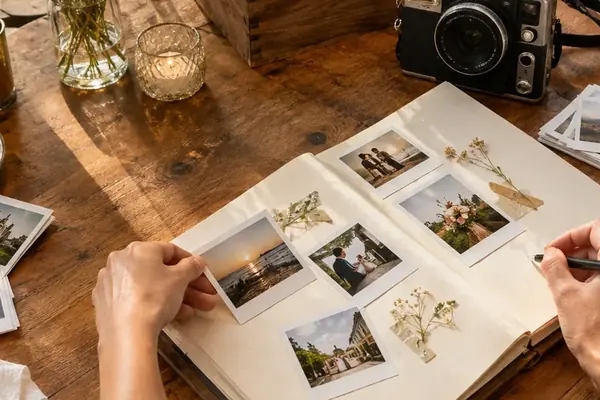
The signature charm of retro photography prints lies in their thick white or tinted paper framing and the wider bottom chin built for handwritten dates, locations, and notes. Navigating the white-chin boundary requires separating three distinct factors: the image window determines the crop, the outer trim determines the safe area, and the border coating—not its nostalgic appearance—determines how a handwritten date behaves.
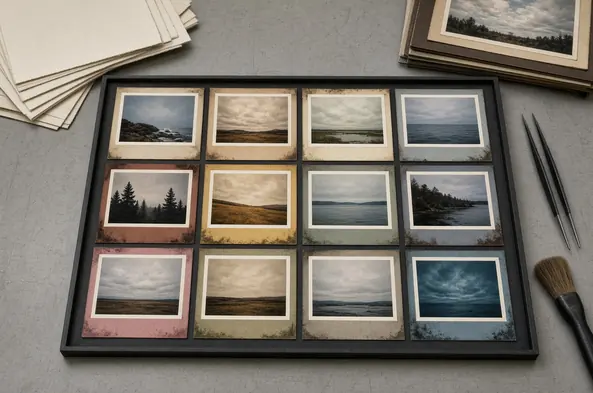
In print production, bleed refers to image or background extending beyond a trim line, while a safe area keeps important content inside that boundary. Decorative borders, image-window masking, and mechanical cutter movement are related production concerns with distinct effects on your framing. Automated cutters shift slightly during trimming, and window masks overlap the edges of the digital file. Instead of guessing at a universal millimeter margin, check both the photo-window edge and the outer paper trim in the supplier’s upload preview, and follow their stated safe-area allowance. Pull fingers, pet ears, veil edges, and in-app date stamps inward from the boundary so the white border never swallows them.
Once the prints arrive for diy projects or wedding guestbooks, the bottom margin presents a tactile crafting choice. While the wider bottom border provides generous caption space, a matte visual appearance does not establish that the paper surface is absorbent or suitable for every pen. Ordinary gel ink may smear across glossy coatings, while broad felt tips may feather into absorbent uncoated stock.
Test Ink Before Stacking
Select a fine-tip pen labeled for your actual paper surface and follow its stated drying instructions. Before stacking finished prints or sliding them into album sleeves, press a piece of clean scrap paper against a test caption on a spare print to check for transferred ink—a surface that looks dry to the eye can still mark the next white border in the pile.
Looking at the album queued for print on your phone right now, will you spend five minutes checking pixel dimensions and edge crops tonight, or risk discovering dark faces and missing foreheads when the print box arrives?