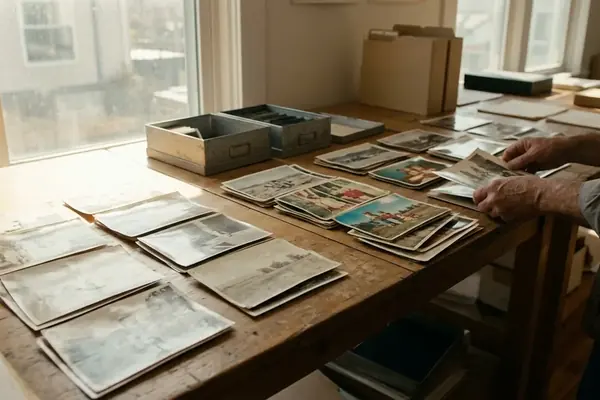

From Dutch Wall Calendars to Modern Retro Print Keepsakes
In Dutch households, the verjaardagskalender is an established domestic fixture, traditionally hung in a frequently visited spot—including the small toilet room—so nobody misses a family milestone. Because its recurring month-and-date format omits printed years and weekday sequences, the calendar carries birthdays seamlessly across the December 31 to January 1 transition without needing replacement every January. Adapting this European household custom into a handmade calendar gives your phone photos a permanent physical role on the wall, turning fleeting digital camera rolls into functional print displays.
Building a durable perpetual photo calendar comes down to four material and layout choices: acid-free, lignin-free matte cardstock of at least 300 gsm, a dateless two-column vertical grid, photographic-storage corners that attach to the page while holding the print without adhesive contact, and hinged loose-leaf binder rings that open for future sheet replacements. A calendar built to last needs leap-day space on February 29, a 1.5-inch top binding clearance, and enough ring clearance to turn twelve photo-bearing sheets smoothly.
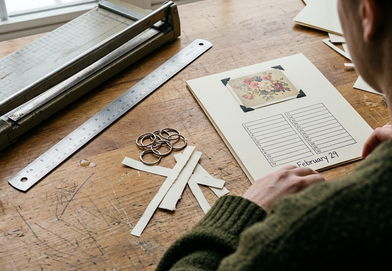
Before cutting or printing a single sheet, assemble the complete toolkit and material stack:
- Cardstock: Twelve 8.5 × 11-inch portrait sheets of acid-free, lignin-free matte stock rated at a minimum of 300 gsm (note that a 110 lb cover-stock label is an imprecise proxy, as US pound weights vary by paper category and basis-sheet size).
- Prints: Twelve retro photography prints, either square-format or classic white-border instant styles.
- Mounting hardware: Forty-eight paper or uncoated polypropylene photo corners explicitly made for photographic storage.
- Binding components: One rigid protective backing board, two nominal 1-inch hinged metal binder rings, and a length of braided leather cord, velvet ribbon, or brass wire.
- Drafting and writing tools: A metal ruler, a mechanical pencil, a heavy-duty two-hole punch matching your layout spacing, and a 0.3 mm pigment fineliner with documented waterproof and lightfast properties.
Drafting Dateless Monthly Grids on Heavyweight Cardstock
Why do so many handmade wall calendars curl at the bottom edge or tear around the hanging hardware by mid-spring? Standard office paper sits at roughly 75 to 90 gsm, which lacks the structural mass to support a mounted photograph suspended vertically. Upgrading to a 300 gsm sheet provides substantially greater mass per unit area, though a page's actual resistance to bending also depends on sheet thickness, fiber composition, grain direction, and ambient room humidity. When selecting stock, specify acid-free and lignin-free matte cardstock. Cotton rag content is pleasant to handle, though cotton fibers alone do not establish chemical compatibility with photographs, and heavily textured watercolor or felt surfaces must be tested beforehand to verify that fine pen nibs draw unbroken lines and adhesive corner backings stay firmly bonded.
To keep every sheet valid year after year, divide the dates into two vertical columns rather than constructing a traditional seven-day horizontal weekday grid. I always print one trial page on my chosen 300 gsm stock and position an actual physical print on it before running the remaining eleven sheets through the printer. This single test verifies feed-roller clearance and confirms how the physical dimensions interact on the page.
Vertical Measurements for 8.5 × 11-Inch Portrait Sheets
Set the mechanical clearances at the top of the sheet first, fit the photograph window directly beneath the title, and allocate the lower portion to the numbered birthday lines:
- Top Binding Clearance (0 to 1.5 inches): Keep the uppermost 1.5 inches of every sheet completely free of photographs and typography so the punched holes and rotating metal rings never clip your header.
- Month Heading and Photo Zone (1.5 to 6.25 inches): Place the month typography just below the 1.5-inch mark. Reserve the photograph area beginning 2 inches from the top edge, keeping the maximum print height to 4.25 inches so the bottom edge of the print lands no lower than 6.25 inches from the top.
- Breathing Room (6.25 to 6.625 inches): Leave a clean 0.375-inch margin between the bottom of the photograph and the top of the date columns.
- Two-Column Date Grid (6.625 to 10.375 inches): Start the horizontal date lines at 6.625 inches from the top edge. Space sixteen lines vertically at 0.25-inch intervals, placing the sixteenth line at 10.375 inches and leaving a 0.625-inch bottom margin.
For 31-day months, number lines 1 through 16 down the left column and lines 17 through 31 down the right column, leaving the final sixteenth line on the right blank. End shorter months at their actual final calendar date. On the February sheet, always include a dedicated line for February 29 at the bottom of the right column so leap-year birthdays have an explicit home.
Curating Seasonal Retro Prints and Archival Corner Mounting
Sequencing twelve photographs across the year works best when the color palette and lighting of each print echo the mood of its month. An August beach photo brings warm amber and golden-hour tones to late summer, while a quiet indoor portrait with softer shadows suits November. Engagement portraits can be paired with the seasons they were taken, or family scrapbooking archives can supply nostalgic summer snapshots for July.
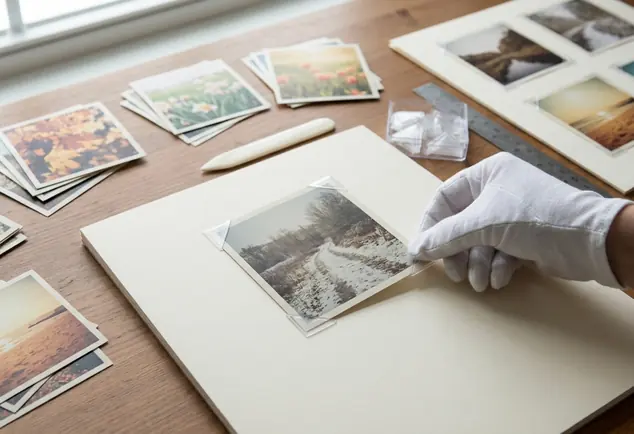
Once the twelve images are sequenced, mount them using photographic corners rather than permanent double-sided tape or liquid glue. Unsuitable adhesives can stain prints, migrate into photographic backings over time, or complicate removal when you want to refresh a picture. While the corners themselves attach adhesively to the cardstock page, they create an adhesive-free pocket for the photograph, letting an August beach print leave the page intact whenever you decide to swap it.
Select paper or uncoated polypropylene corners explicitly designed for photographic storage. Acid-free and lignin-free paper specifications are useful baselines, and evidence of passing the Photographic Activity Test (PAT) provides stronger technical support that the mounting enclosure will not interact poorly with your prints. You can review the Library of Congress preservation guidelines for photographs for deeper context on safe storage enclosures, careful handling by the edges, and environmental protection. Note that while silver mirroring is a known degradation mode in traditional darkroom prints containing a metallic image-silver layer, ordinary home inkjet retro prints do not contain image silver; for digital prints, the primary mechanical risks are physical abrasion and adhesive staining.
Protect Display Print Copies
Because a wall calendar remains exposed to ambient light and seasonal air changes, treat the mounted photographs as replaceable display copies rather than a permanent preservation vault: store your original files or negatives separately, and hang the finished calendar away from direct sunlight and damp rooms.
Step-by-Step Corner Mounting Procedure
To mount each print without buckling the border, dry-position the photograph on the sheet with its bottom edge aligned at the 6.25-inch mark. Slip all four corners onto the corners of the photograph first, set the entire assembly down onto the cardstock, and mark the outer corner edges lightly with a pencil. Lift the print, press the self-adhesive backs of the corners onto the cardstock just outside your pencil ticks, and slide the print back into the pockets—leaving just enough lateral clearance to withdraw the photograph later without bending its edges.
Two-Hole Loose-Leaf Ring Binding and Wall Hanging Hardware
When I bound my first heavyweight calendar using a continuous spiral coil at a local print shop, the pages fought the hanger whenever flipped, and replacing a single ink-smudged sheet required cutting the coil apart. Switching to two hinged metal loose-leaf binder rings solved both mechanical problems at once: individual months unclip in seconds for edits, and the pages hang cleanly from two balanced anchor points.
Accuracy during punching prevents the calendar from hanging crookedly or catching against the rings during the monthly flip. Never force the full thirteen-piece assembly—twelve 300 gsm sheets plus the backing board—through a punch at once, as heavy-duty sheet capacity ratings are calculated using thin 75 gsm office paper.
- Create a Registration Template: Cut an 8.5-inch-wide scrap strip of cardstock. For a centered 2.75-inch hole spacing, measure and mark hole centers at 2.875 inches and 5.625 inches from the left edge, placing both center points 0.5 inch below the top edge.
- Verify Ring Clearance: Set your two-hole punch to match the 2.75-inch spacing and 0.5-inch throat depth. Punch the scrap template, slip a nominal 1-inch hinged ring through the hole, and overlay it on your trial calendar page to verify that the metal ring clears the top typography and photograph area.
- Punch in Small Batches: Transfer the registration marks to your monthly sheets. Punch the 300 gsm cardstock in small batches well within your tool's mechanical comfort zone, emptying the waste tray between presses so compressed paper slugs do not jam the punch heads. Punch the thick backing board separately.
- Size the Hinged Rings: Stack all twelve mounted pages on top of the backing board and snap two nominal 1-inch hinged metal rings through the holes. Because outside ring diameter does not equal usable flat stack thickness, flip all twelve pages over the top to confirm the sheets turn freely without binding or catching on the mounted photo corners.
- Rig the Two-Point Hanging Cord: Cut a length of braided leather cord, velvet ribbon, or brass wire and tie equal-length ends to the two metal rings, forming an inverted V above the top edge.
Place the center of the inverted V over your wall hook and adjust the knots at the rings until the top horizontal edge of the cardstock hangs completely level. Whether the assembled calendar rests flat against the wall depends on total stack thickness, how freely the holes pivot around the ring circumference, and the angle of the wall hook.
Archival Ink Selection and Updating Pages as Your Circle Grows
Smooth 300 gsm matte cardstock can cause slow-drying inks to sit on the surface and smear under your hand. Before writing on your finished January sheet, select a 0.3 mm pigment fineliner that carries explicit manufacturer documentation for both waterproof and lightfast performance—pigment ink formulations are not automatically waterproof on every coating, and gel pens are not uniformly dye-based. Run a timed smear check on a scrap offcut of your exact cardstock: write a sample name, then swipe a dry finger across the ink at 30 seconds, 2 minutes, and 10 minutes to establish a reliable working dry time before touching the calendar pages.
Format every birthday entry with the person's name followed by their four-digit birth year in parentheses, such as Clara (1988). This compact notation makes milestone math effortless: the age a person reaches on their birthday in any given year equals the current calendar year minus 1988, while their age on any date prior to their birthday that year is simply one year lower. Keep the digital layout template and a print-ready copy stored alongside your curated retro print files so you can reprint a single month whenever a date line gets too crowded.
During your annual January reset, flip through all twelve pages to add new arrivals, check the hinged ring closures, inspect the hanging cord knots, and slip updated family portraits into the corner pockets without disturbing the adhesive mounts.