Rescuing Vintage Prints from the 1990s Magnetic Album Trap
There is a specific sound—a dry, resisting crackle—that accompanies the opening of a forgotten family archive. Peeling back the crinkled clear film of a 1990s magnetic album reveals a distinct and troubling failure pattern. Adhesive stripes have yellowed the page beneath the plastic overlay, creating a visible grid of degradation that threatens the images housed inside. Color has shifted exactly where the print contacted the backing, permanently altering the original tones of the photograph. Often, one edge resists lifting because the paper has fused entirely to the tacky coating.
A magnetic album assembled in that era now reflects roughly 25 to 35 years of continuous contact between its prints, the adhesive-coated pages, and the plastic overlay. Stop pulling the moment resistance appears. Forcing a stuck photograph free can split its paper support or lift the image layer right off the base, destroying the memory you intended to save. Keep the page supported and pause the removal attempt within a second or two of feeling that tension rather than bending the print upward.
The safest path forward for retro prints relies on acid-free photo corners and archival mounting tapes. Liquid glues, rubber cements, and standard craft tapes pose severe risks of irreversible chemical and physical damage to photographic keepsakes. The mounting method you choose now largely determines whether the collection survives the next few decades intact.
Chemical Migration and the Rule of Reversibility in Memory Keeping
The adhesive decision begins with treating the print as a layered object rather than a simple decorative paper rectangle. A photograph comprises a base support, a binder, and the image material itself. When you introduce a foreign chemical substance to the back of that stack, you initiate a slow-motion reaction. Acids and oxidation products move readily from a low-quality adhesive into the paper support.
Warm or humid storage accelerates this transfer, producing yellowing, a loss of flexibility, and eventual embrittlement. Brown pinpoint spotting, commonly called foxing, relates directly to this paper deterioration but can also stem from localized adhesive failure. Memory keeping demands reversibility. You want the ability to remove a print decades later without tearing the emulsion or the paper backing. The chemical makeup of retro prints, especially instant film and darkroom paper, makes them uniquely vulnerable to solvent-based adhesives. A mounting technique that seems secure today might become a permanent, damaging bond tomorrow.
Inspect mounted prints at three to six months, and then every year or two after that. Look for yellow halos, translucent spots, curling edges, tacky residue, or a sharp chemical odor. Keep handling sessions brief during these checks to minimize exposure to environmental fluctuations.
Temperature Transition Protocol: Allow cold-stored photographs to remain inside their closed enclosure for roughly half an hour to an hour before opening them, reducing the chance of condensation forming on the image surface.
Zero-Contact Mounting: The Case for Polyester Corners and Hinge Tapes
The retro-print adhesive-contact ladder prioritizes four zero-contact pockets first, two short upper hinges second, and full-back bonding last. Archival polyester or acid-free paper corners rank at the top of this hierarchy. Their pressure-sensitive adhesive bonds to the album page while the photograph sits mechanically inside the four pockets, ensuring zero adhesive ever touches the print itself. This mechanical hold provides security without chemical compromise.
For a flush appearance, choose a double-sided mounting product made specifically for photographs. The most reliable options carry documentation showing they passed the Photographic Activity Test. ISO 18916 specifies this methodology, using accelerated incubation for 15 days at 70 degrees Celsius and approximately 86% relative humidity to detect harmful image interactions. Products meeting this standard offer a dependable starting point for archival safety, though real-world storage conditions introduce variables that no standardized test fully replicates.
Proper application emphasizes minimal usage. For a print measuring around 89 by 108 millimeters, use four correctly sized corners or two tape hinges roughly 10 to 15 millimeters long. Place these hinges near the upper back edge without sealing all four sides. After positioning a hinged print, apply light pressure to the tape area for several seconds. Avoid burnishing across the image surface, which can cause physical abrasions.
These mounting choices cannot compensate for an acidic scrapbook leaf or a plasticized PVC sleeve. The page, interleaving, and enclosure also need photo-safe materials. A linen cover alone says nothing about the chemistry inside the album.
Physical Deformation: Cockling and Solvent Damage from Liquid Glues
Risk assessment separates immediate physical change from delayed chemical change. The craft aisle offers countless quick fixes, but speed often trades archival stability for immediate gratification. Water-bearing liquid glue wets one area of a paper support more than another. As that patch swells and then contracts during drying, the print can cockle or pull the album page into a wave. This cockling can become visible within the first hour of drying, even when the page initially looked perfectly flat.
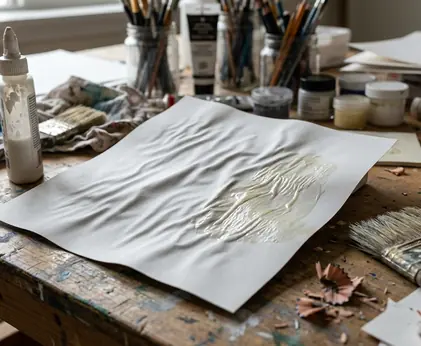
Solvent-based rubber cement and spray adhesive add volatile compounds and oxidation-prone residues to the environment. An uneven spray layer often becomes brittle, loses its tack, and flakes away after a few years, leaving prints loose and stained. Standard glue dots present a similar convenience trap. While easy to apply, many contain plasticizers that leach into the print backing and cause localized discoloration over time.
Check spray-mounted or glue-dot-mounted prints after one to three months, and again toward the end of the first year. Watch for corner lift, brittle flakes, circular stains, or adhesive transfer to the facing page. If an adhesive lacks stated photographic-use specifications, PAT documentation, or an identified carrier material, test it on a duplicate made on comparable paper rather than an original print.
Securing an Original SX-70 Print in a Linen Scrapbook
Mounting an original Polaroid SX-70 integral instant print into a linen-bound scrapbook requires strict adherence to the zero-contact boundary. Adhesive may touch the acid-free page and the paper corner tabs, but never the image layer, white frame, sealed edges, or integral print backing. That separation protects the delicate chemistry of the instant film.
First, confirm that the interior page is acid-free and lies flat. An SX-70-format integral print measures approximately 88 by 107 millimeters, featuring a square image area of roughly 79 by 79 millimeters. Place the print on the page to determine the desired layout.
Use a metal grid ruler and a soft HB or 2B graphite pencil to mark only the outer corner positions. Keep these placement marks within a millimeter or two of the corner positions so the photo corners will completely conceal them.
Slip one acid-free paper photo corner over each corner of the print before exposing any adhesive. With all four pockets attached to the photograph, peel the backing off the adhesive tabs. Carefully align the bottom two corners with your pencil marks and press them down, followed by the top two.
Press each corner tab for several seconds with the flat side of a bone folder. Leave the open album undisturbed for 15 to 30 minutes before closing it. Recheck the alignment and corner adhesion a day or two later. The print should slide slightly within the pockets rather than being clamped or bowed.